Hello Friends! Welcome back to another edition of Organize It Thursday! We've been talking about different areas of the kitchen that can easily be organized for just a few dollars! Today, I have a simple solution for all those plastic shopping bags. I originally did this project about a year ago, and I still love my bag "organizer".
Yes, it's true! All my plastic shopping bags have found a home. Ok, well I had to make a home for all of them, but I was glad to do it to get rid of the mess they made.

I put together this "plastic bag holder," (have no idea what else to call it) from something most of us have in our pantries right now. (Keep reading; it's coming) We use plastic bags around the house like most people- trash bags. When I say "we," I mean my son. He uses them to take out trash from all the bathrooms. That's his chore, and they're perfect for those small trash jobs, right? But sometimes, we have more bags than we know what to do with. They can make a mess.

I was tired of the messy drawer and wanted it back to be honest. So I had an idea! Dangerous I know, but it worked out! The bonus here is that I had all the materials from other projects so my "plastic bag holder" cost me $0. My favorite! And here's how I did it. Yes, this is another up-cycle project.

Sometimes, you just have to think outside the box. In this case, I had to think outside of the oatmeal container. These are great containers and people have re-used them for all kinds of organizing projects. I thought they'd be perfect for holding all my plastic bags.
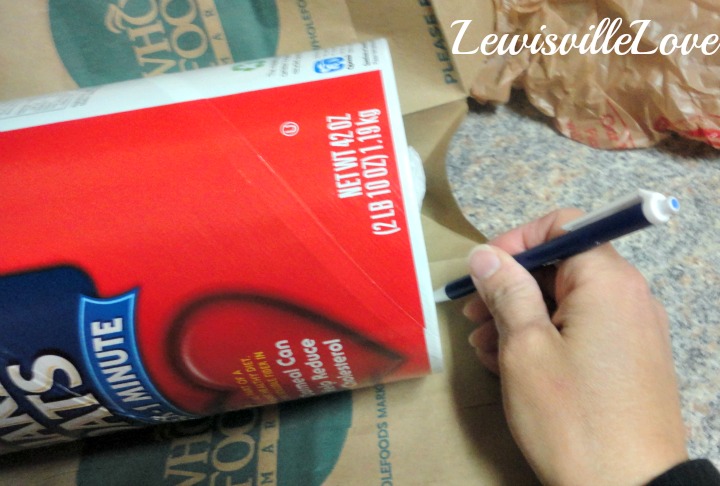
But I like things to look nice, so I had to give it a little make over. First, I covered it in a paper bag. We rarely shop at Whole Foods, most of you can guess why, but it is one of the only places that carries all of our crazy health food/vitamins needed here in Lewisville. One of my favorite things about shopping there is getting paper bags. Takes me back to my school days....way back obviously.

I cut open a paper bag and marked the bag as I rolled the container. Then, I cut the paper along the line I drew and glued it to the container.

Ta Da! I cut the bottom of the container like so.

Perfect for plastic bags to be pulled out.


Covering the lid was not as easy. Tracing the outside of the lid made my template to large. I finally figured out I could trace the inside of the lid using plastic wrap.
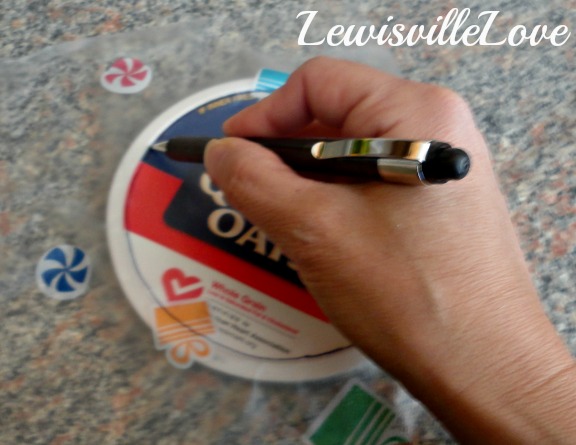
I cut it out and now have a template for the lid cover.

Everything got wrapped in burlap.

And I'm just loving the way burlap and natural wood look together. I had this piece of stained wood in my garage. I almost threw it away and decided to save it for something down the road. Here we are - down the road.

I drilled some holes and used twine as a hanging line.

Once that was done, I used wood glue to attach the container to my piece of left over wood.

I reinforced it with a screw just on the inside of the container,

and one on the outside at the bottom.

A few pieces of twine around the lid and some white ribbon completed my project.


And that was it! It hangs in my laundry room, ready to dispense plastic bags to our pleasure!

These are small projects but they make a huge difference in getting organized.


Yes, it's true! All my plastic shopping bags have found a home. Ok, well I had to make a home for all of them, but I was glad to do it to get rid of the mess they made.
I was tired of the messy drawer and wanted it back to be honest. So I had an idea! Dangerous I know, but it worked out! The bonus here is that I had all the materials from other projects so my "plastic bag holder" cost me $0. My favorite! And here's how I did it. Yes, this is another up-cycle project.
Sometimes, you just have to think outside the box. In this case, I had to think outside of the oatmeal container. These are great containers and people have re-used them for all kinds of organizing projects. I thought they'd be perfect for holding all my plastic bags.
But I like things to look nice, so I had to give it a little make over. First, I covered it in a paper bag. We rarely shop at Whole Foods, most of you can guess why, but it is one of the only places that carries all of our crazy health food/vitamins needed here in Lewisville. One of my favorite things about shopping there is getting paper bags. Takes me back to my school days....way back obviously.
Ta Da! I cut the bottom of the container like so.
Perfect for plastic bags to be pulled out.
Covering the lid was not as easy. Tracing the outside of the lid made my template to large. I finally figured out I could trace the inside of the lid using plastic wrap.
I cut it out and now have a template for the lid cover.
Everything got wrapped in burlap.
And I'm just loving the way burlap and natural wood look together. I had this piece of stained wood in my garage. I almost threw it away and decided to save it for something down the road. Here we are - down the road.
I drilled some holes and used twine as a hanging line.
Once that was done, I used wood glue to attach the container to my piece of left over wood.
I reinforced it with a screw just on the inside of the container,
and one on the outside at the bottom.
A few pieces of twine around the lid and some white ribbon completed my project.
These are small projects but they make a huge difference in getting organized.
And now I have a direction as to how I want my laundry room to look!
Hope you found some inspiration here in Lewisville.
Blessings,
Lisa
I link all my projects with some wonderful blogs. To visit them, go to
the {Link Party Love} page found at the top of this page on the {Home}
bar.
Also linking to:
Between Naps on the Porch
Savvy Southern Style
No Minimalist Here
The Shabby Creek Cottage
Saved by Love Creations
Miss Mustard Seed
Funky Junk Interiors
Coastal Charm
Restore Interiors
Tip Junkie
Also linking to:
Between Naps on the Porch
Savvy Southern Style
No Minimalist Here
The Shabby Creek Cottage
Saved by Love Creations
Miss Mustard Seed
Funky Junk Interiors
Coastal Charm
Restore Interiors
Tip Junkie
Such an economical wonderful idea.... Love it..
ReplyDeleteHugs