Ok, so enough of my problems, how about a new before and after. I have to admit, this one is my new favorite! Just take a look at my new chairs!
They are BEE-UTE-A-FULL! I LOVE, LOVE, LOVE them! But I didn't always love them, especially when they looked like this.
The chairs came as part of a dining room set we got last year from a friend. She found it at a thrift store and passed it along when she heard our dining table fell apart. Love friends like that!
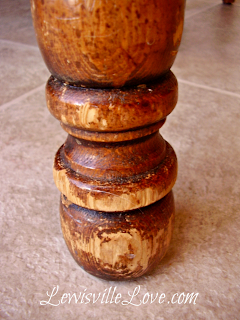
Even thought the table was a little scratched up, especially on the feet, I knew I could do something with the set. I just wasn't sure how or what.
I painted the table last year and posted about it HERE. The problem is that I did it wrong, and I haven't wanted to tackle the chairs because of it. It turns out, when you use the wrong paint, the project will just need to be redone. I used a latex paint for the table which just means the paint is pliable and scratches and dents become common place in said table. So I researched and decided to tackle my chairs...one year later.
Ya, I know.
I wasn't crazy about the flower carvings in the chairs, so I decided to fill them in with wood filler.
The chairs were sanded which took a while and is my least favorite part of any project. At this point, four of the chairs were sitting in the garage, and we were only using two of these chairs at the end of the table.
I redid my other dining chairs in black (from the broken table set). You can read about that project HERE. I learned a lot from that project, like keep the chairs in tact rather than take them apart and paint individual pieces. My table is off white and I LOVE the black and white look. That's why I painted my chairs and table in different colors...just in case you were wondering.
Anyways, back to these chairs. The sanding doesn't have to be down to the wood, just make sure you use a good spray primer.
I used two coats of Rust-oleum white primer in the spray can.
At this point, I gave away the other four chairs to the goodwill because I was sure I wouldn't need them. I don't like re-doing chairs. There's a lot of work that goes into them and they're time consuming. After seeing how they were turning out though, I kind of wish I had kept them.
I learned that my table should have been painted with an enamel paint. Enamel dries hard and has a very strong paint odor. It also takes about two days to dry before it can be used or before you can apply your protective finish.
From here on out, I'll be spray painting my chairs rather than using a brush like my black chairs. It's so much easier.
While the chairs were drying I worked on the seats. I used the same method as I did with my black dining room chairs. This time though, I wanted to add extra padding to have a more luxurious feel.
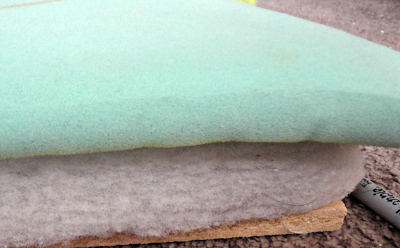
I had some old patio cushions that had been sitting in the garage. They were about to be thrown away when I realized it was only the fabric that had seen better days. The foam inside was perfectly in tact, so I added that foam to the cushion that was already being used.
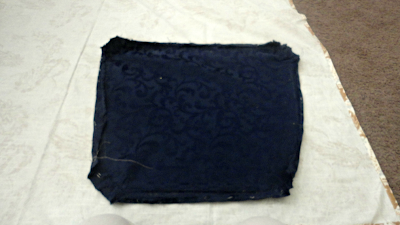
I used the old piece of fabric that was already on the chair as my template to follow, but realized with the extra padding I needed more fabric around the edges.
The foam should be a few inches bigger than the seat so that you won't feel the wood on the back of your legs when you sit down..
I adore the material, even more so since it was a tablecloth on sale from target for just $4. I found it during the after Christmas sale and have been holding onto it for just the right project. Hello, Right Project!
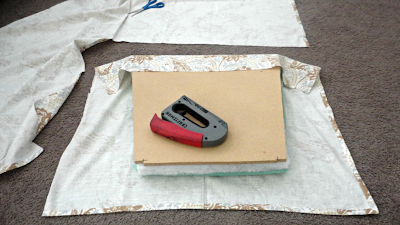
To reupholster a seat cushion, you'll need to get out your staple gun. I have one that works wonderfully that came from the Home Depot for under $20. It has come in handy many times.
Staple opposite ends first and make sure your material is nice and tight. Check to see how it looks after you staple the two opposite sides. Staple the other opposite sides, then the corners.
Once the cushions are done, you can re-attach them to the seat. Save your nails and hardware in a marked plastic baggy so nothing gets lost.
Don't they just look great! But I'm not done yet! I have one more finishing touch to add to them which I'll talk about later this week...pending no more computer problems.
LOVE. LOVE. LOVE. I can't help but look at them first thing in the morning when I come down the stairs and see them. It's that new furniture phase I'm in right now. I'm just experiencing it with new "to me" furniture.
I"ll show you what the dining room set looks like with the different colors and chairs as soon as I redo the table. It's not a perfect matching table, but it works really well together.
Blessings,
Lisa
Fluster Buster
Posed Perfection
I link all my projects with some wonderful blogs. To visit them, go to
the {Link Party Love} page found at the top of this page on the {Home}
bar.
Also linking to:
Between Naps on the Porch
Savvy Southern Style
No Minimalist Here
The Shabby Creek Cottage
Miss Mustard Seed
Funky Junk Interiors
Coastal Charm
Also linking to:
Between Naps on the Porch
Savvy Southern Style
No Minimalist Here
The Shabby Creek Cottage
Miss Mustard Seed
Funky Junk Interiors
Coastal Charm
Fluster Buster
Posed Perfection


Wow you really did a great job on the chairs. I love the new color and the fabric you added. I would love for you to come and link this up to my Fall into Fall party going on right now. Hope to see you there. http://diybydesign.blogspot.com
ReplyDeleteThanks, Judy. I love linking up to your party.
DeleteOMG...these chairs turned out great! I can see why you're sorry you gave the others away. From time to time I toy with the idea of painting ours, so I'm glad to know which paint, etc. Thanks for the info!~Zuni
ReplyDeleteI wish more and more I had kept the other chairs, but I'll find another table to redo at some point and that will help. The enamel is the best paint for tables and chairs. Have fun.
DeleteHello! Gorgeous transformation! Wow! Come link up to centerpiece Wednesday and share this post with us http://thestylesisters.blogspot.com/2013/09/welcome-to-centerpiece-wednesday-92.html
ReplyDeleteKarin
Thanks for the invite, Karin.
DeleteHi Lisa what an amazing transformation! Love the color you choose for the fabric and stain, it makes them more contemporary and airy! Can't wait to see the table done! Thanks for sharing at the Fluster Buster Party, Have a great week, Lizy your party co host
ReplyDeleteThanks, Lizzy. And congratulations on co-hosting!
Deletelove it the new to me stuff is always the best in my book the new stuff just doesn't fit the look that I love your chairs are perfect
ReplyDeletecome see me at http://shopannies.blogspot.com
Beautiful job!! They look completely different and are so so pretty!
ReplyDeleteLisa, I found you over at The Shabby Creek Cottage and I'm glad I did. Wow, that's quite the transformation of your chairs - so pretty. I like the detail you kept on the backs - so pretty!
ReplyDeleteMarie@InteriorFrugalista
These chairs are stunning! And, what a great tutorial. Super detailed and helpful. Please share this at Stylish Friday Finds! My readers would love to see this tutorial/makeover.
ReplyDeleteHave a great weekend.
Karen
http://www.astylishinterior.com/2013/09/stylish-friday-finds-2.html
I have a "thing" for chairs! I LOVE how you transformed these!
ReplyDeleteYou did a great job--I have a hard time resisting a pretty chair!
ReplyDeleteLooks wonderful. Love the color and fabric choice.
ReplyDeleteYou did such a fantastic job on your chairs...I knew I liked them the minute I saw them... I have made curtains for my dining room with the same tablecloths :) Would love it if you came by One More Time and shared.. http://www.onemoretimeevents.com/2013/09/share-it-one-more-time-at-one-more-time.html
ReplyDeleteSa-weet upcycle! they look awesome! I passed over a chair the other day, not sure if I could handle it, but I won't do that anymore! Good job!
ReplyDeleteBeeeeeeeeautiful!! :)
ReplyDeleteLove the chairs!
ReplyDeleteLove the chairs!
ReplyDeleteI love the redo, they look amazing. Thanks tons for linking to Inspire Me. Hugs, Marty
ReplyDeleteThese look great... I've got a couple I need to get recovered and now, you've inspired me to get this done this weekend....
ReplyDeleteSuzie @ Dorothy Sue and Millie B's too
Love this... You've inspired me to finish a couple chairs that I have hanging out in the garage!!!
ReplyDeleteI'm a new follower and hope you'll come follow me back.
Suzie @ Dorothy Sue and Millie B's too
Love your "new" chairs. You are one of the features today at the Make it Pretty Monday party at The Dedicated House. Pop on over and grab a feature button! Here is the link to this week's party. http://thededicatedhouse.blogspot.com/2013/09/make-it-pretty-monday-week-68.html Hope to see your prettiness again at the bash! Toodles, Kathryn @TheDedicatedHouse
ReplyDeleteThese look fantastic in white! I spray painted my first set of chairs, but painted my second set with a brush...so tedious! Our Get Your DIY on Fall Party Challenge is under way and this week's theme is spray paint projects! These would be perfect! I hope you'll consider joining our party: http://www.confessionsofaserialdiyer.com/get-your-diy-on-spray-paint-projects-features/ Love to see you there :)
ReplyDeleteHa! I bought the last table cloth at Target for $4. Found them in April on an end cap for $1 each! I bought a whole mess of them. I'm upholstering 2 wingback chairs with them :) Love your chairs, and thanks for the piping tutorial (I've always sewn mine, never thought about hot glue!)
ReplyDeleteAwesome blog with nice choice..!!!Bedroom Furniture Online
ReplyDelete