Anyway, as promised, today I'll be sharing with you how to make your own custom labels (like below).

I have lots of pictures for you to follow along so you can make your own labels. Hopefully, you'll understand everything I'm saying in this post, but if not, drop me an email.
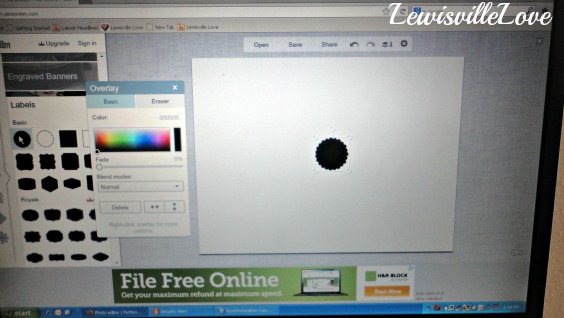
First, I make all my labels by using a free, online photo editing program called Picmonkey.com. Go there to make your white starter template and click on edit photo.


I chose a picture of a dresser that I'm working on but haven't posted about the project yet. I'm not getting rid of the picture-just making a starter template with it.

On the left, go down and click the OVERLAYS icon.


Then hit save again on the lower left side to save the new white starter template to your computer.

It will ask if you want to replace the existing picture. No, you do not want to replace it, otherwise you will loose your original picture. So rename the new white starter. Here, I renamed mine "white template". Original, I know!

Now, you can go to picmonkey any time and work on labels to your heart's delight.
To start making those labels right away, click on the OVERLAYS Icon again and scroll down until you see LABELS. Picmonkey also has Victorian labels and Grunge labels to choose from.

Picmonkey has many free editing features everyone can use. That is why I LOVE them. The basic labels are free and you can choose any of them. The Royale features (the crown icon is next to all the royale features) require that you pay for membership. At just $5 a month, it's still a great deal.

I chose the first basic (and free) label.

Just click on it and it will show up on your white template.
Resize it and change it to any color you want it to be. I'm going with blue(ish).

To make more than one label, right click on the image and click on "DUPLICATE OVERLAY"


Resize it, change the color, and place it on top of the first label (in this case the blue label).

I changed the color to white. Now duplicate the white label to place on the second blue label.


For the finishing product, click on the text icon (the big P) to add text to your label. Choose a font you like but remember, only the ones without a crown next to them are free.

Add your text, change the size, change colors if you want, etc. This is the Lobster Two font, one of my new favorites.

Click Save right above your photo, then you can save it to your computer in a file of your choice. To make more labels to save, delete your text, add new text like Twin Sheets, King Sheets, and save those new labels. Delete your text again and add Towels, Beach Towels to the labels and save. You can delete and add text as many times as you like, but once you close Picmonkey, you'll have to start over with your blank labels or the white starter template.

To print, I use Publisher on my P.C. since I don't have ipages for my Mac. Just start a new page, select your picture from file, and click on your blank page to view your photos. Choose your picture (label) and resize it. Here I added the label I made on Picmonkey today and two sets of blank labels.

You can always add your own font to the labels using these programs too.

I know it sounds like a lot to do, but once you get the hang of label making, it's really fast and easy...and addicting. As I make more labels for my organizing projects, I'll make sure to make them available to all my LOVELY readers, free of course. Picmonkey is really easy to use for your own custom designs though. I suggest you go on there and play around with their features. Hope you found some inspiration today. Have fun making labels.
Blessings,
Lisa
I link all my projects with some wonderful blogs. To visit them, go to
the {Link Party Love} page found at the top of this page on the {Home}
bar.
Also linking to:
Between Naps on the Porch
Savvy Southern Style
No Minimalist Here
The Shabby Creek Cottage
Saved by Love Creations
Miss Mustard Seed
Funky Junk Interiors
Coastal Charm
Restore Interiors
Tip Junkie
Also linking to:
Between Naps on the Porch
Savvy Southern Style
No Minimalist Here
The Shabby Creek Cottage
Saved by Love Creations
Miss Mustard Seed
Funky Junk Interiors
Coastal Charm
Restore Interiors
Tip Junkie
Thank you very much, perfect post:)
ReplyDeleteThis is going to be very useful for me. Thanks for making the instructions so easy to follow.
ReplyDeleteHi
ReplyDeleteJust wondering the card stock is not sticky, so how do you stick it on the various containers.
I love your labels and your pantry.
/jonie
Hi Jonie,
ReplyDeleteOoops, I guess I should have mentioned how I put my labels on my canisters. I just rolled up packing tape (its the stickiest). If you've protect them well, you can also hot glue them. I wash mine out in between uses so I wanted to make sure I could take the labels off when I needed to. Both of these methods will allow you to take them off when needed. Hope that helps.
Blessings,
Lisa
Thank you for the awesome tutorial! I use PicMonkey too, but I hadn't thought of using it for labels. I'm visiting from Sew Many Ways.
ReplyDeleteThis comment has been removed by the author.
ReplyDeleteThanks so much! I'm definitely going to try this for my pantry organization project! xoxo, jamie
ReplyDeleteMarilyn to Jackie, one girl's dive into the domestic
So glad you showed how to make labels. I am going to make some for a future project I am working on.
ReplyDeleteJenny @ http://jennylynndesignz.blogspot.com/
Wow these labels look great and easy to make. I will keep in in mind if I need to make labels sometime :)
ReplyDeleteThanks for this great tutorial!
ReplyDeleteI have been trying to do this and missed a couple steps, so thanks to your tutorial I now have. Thank you so much. I pinned this.
ReplyDeleteThis tutorial is very helpful to me. I am a bit computer illiterate, so thank you for going through these labels step-by-step.
ReplyDeletehugs
Crystelle
cute labels & great tutorial. thank you for sharing!
ReplyDelete-ashley
ashleyrachelle.com
Hi lovely lady.
ReplyDeleteThanks so much for this great Idea!! I always need labels in my home. Im your newest follower on your blog now, hope you come see me also.
Diane
Thanks SO much for posting this! I'm not savvy with technology and this was a perfect, step by step tutorial for people like me! I've tried to use Pic Monkey since I saw your awesome pantry and never could quite "figure it out!" I'm working on my St Patty's Day cookout labels RIGHT NOW! Thanks again, SO MUCH! :) I really enjoy your blog! I'm new to the blog and DIY world and you were one of my first "finds"...a really great one! :)
ReplyDeleteThanks for this tutorial!! I'm a label-lover too!
ReplyDeleteThank you so much. I have been wanting to learn how to do this.
ReplyDeleteI always wondered how people made such nice looking labels for their pantry and linen closets! Thanks for the very descriptive tutorial :)
ReplyDeleteStopping by from Not Just A Housewife's show-me-what-ya-got-110
Brilliant idea and brilliant tutorial! Many thanks for sharing this. Isn't picmonkey the best!
ReplyDeleteIf you have a minute to spare perhaps you could link up this great tutorial to my Say G'Day party? It has just started and I would be so thrilled if you could join in.
Best wishes,
Natasha in Oz
Great tips! Thank you so much. I am hosting a giveaway on my blog. I hope you'll stop by and enter.
ReplyDeleteHappy St. Patrick's Day!
I always use picmonkey for photo edits. I love the ease of it. I am so glad you shared this tutorial for labels. My head is churning with what I could use it for. I am actually seeing it used as hang tags for craft fairs. Great step-by-step. Thank you for sharing!
ReplyDeleteGreat tutorial thanks! I love pic monkey but hadn't thought of using it like this! Thanks again!
ReplyDeleteThank you for this tutorial. I'm just starting out blogging and using Picmonkey and this is very helpful.
ReplyDeleteSydnie
Life encouraged.com
Great tutorial -- another good reason to love PicMonkey! You are featured this week on Busy Monday at A Pinch of Joy! I hope you will stop by and grab a Featured Button from the Button Box on the sidebar. Pinned. Can’t wait to see what else you’ve been working on!
ReplyDeleteLisa, great tutorial! I love PicMonkey. You will be one of the features tomorrow at the Make it Pretty Monday party at The Dedicated House. Pop on in and grab a feature button for your blog. Hope to see your prettiness again on Monday. Toodles, Kathryn @TheDedicatedHouse
ReplyDeleteWhat a great tutorial! thank you for sharing. Don't you just love Picmonkey?!
ReplyDeleteHave a great week!
Blessings,
Carolynn
I'll share a couple of PicMonkey tips I use when doing these kinds of projects...first, you can create a collage, delete all but one square, and then save that to make a blank template (easier than the overlay method). Secondly, if you save the image before you add text, and then make a note of what size, font, and color you use for the text, you can upload your image again and add text to it to get more labels. I really think PicMonkey should let you save and edit later, but they don't! Thanks for sharing!
ReplyDeleteGreat tip Lisa! I love Picmonkey!
ReplyDeleteThanks for sharing!
Stacey of Embracing Change
Thanks so much. I really needed this. I'm your newest follower. So glad that I found you.
ReplyDelete~ ~Ahrisha~ ~
Un buen tutorial.
ReplyDeleteMuchas gracias
Abrazos
Oh thank you, thank you, thank you! I have been wanting to know how I could do this with a free program. I seen your blog on the 'Somewhat Simple' blog party and I really enjoy all of your posts!
ReplyDeleteJustina @ http://justinawho.blogspot.com/
Thank you for this!!!! I have been putting so much work into layering my own labels, it would take me half an hour to make about 5 or 6 labels, this is so much easier!!!
ReplyDeleteJeannette
Sticker printing online provide Full color custom die-cut stickers and decals on paper, vinyl, cling, and foil substrates. Personalized stickers offer a highly effective and economical way to create brand awareness.
ReplyDeleteThank you for the knowledgeable tutorial! I love to use PicMonkey, but I hadn't thought of using it for labels. I'm visiting from Sew Many Ways. I am your newest follower on your blog now, hope you come see me also and give better response. I definitely going to try this for my flexographic label printing work.
ReplyDeleteYou've changed my business life!!! I feel like I'm a PicMonkey expert thanks to you! I'll be posting about this same idea soon and if you don't mind, I'd like to link to this post since you were the one that made it happen for me!
ReplyDeleteThanks,
Rachel
www.illjustpaintit.com
I'm so glad that it's helped, Rachel. And of course you can link back! I appreciate the mention.
DeleteBlessings,
Lisa
Love the information and been wondering how to do this for a long time and now I get it. My question though is after you make the label how do you go about cutting it when you have one that is not a square shape all over, like on the fancier ones? I want to use a fancier one like you have on your canisters and wonder how you managed to cut it out so perfect? Thanks so much! Donna
ReplyDeleteThanks for posting this! I've always been confused about how custom label programs work. I'm not exactly what you would call tech savvy. My daughter is buying a custom label program for me right now. I wonder if the one she picks out works like the program described in this post.
ReplyDeletehttp://www.unitedlabel.ca/custom_labels.html