Happy Friday everyone! I love Fridays! My kids love Fridays; I think even my dog loves Fridays. It's the pre-weekend excitement and with the weather here being so lovely, we are looking FORWARD to playing outside, flying kites, taking long naps-ok, the nap thing is my idea of a good time, but you get the picture.
I talked about Spring inspirations here in my last post, and I thought I'd be able to show you my Spring mantel today. As life goes sometimes, I got a little busy with homeschooling and enjoying the sun, so no mantel reveal today. Instead, I'll be showing you how to make a paper rosette topiary. Wow, that's a mouthful. It's part of my Spring mantel decor and it came out so pretty. What do you think?


 For my rosette topiary, I only used the inward and outward rosettes. I used mostly the 24 inch length rosettes, but filled in small areas with the 12 inch rosettes. Creating rosettes takes a while, so grab a cup of tea or coffee (or both) and put on a good movie or two... or three and create away. If you have little helpers in the house like me, recruit them! It's worth the time and I only spent $5 for the entire project, including the candle holder it's sitting on. Thank you thrift store! So one last time...


I talked about Spring inspirations here in my last post, and I thought I'd be able to show you my Spring mantel today. As life goes sometimes, I got a little busy with homeschooling and enjoying the sun, so no mantel reveal today. Instead, I'll be showing you how to make a paper rosette topiary. Wow, that's a mouthful. It's part of my Spring mantel decor and it came out so pretty. What do you think?


So let me just say that I love all the rosette projects going on around blogland. My only problem is that I can never figure out how to make them. Even with step by step instructions I would struggle, but you want to hear something funny? Of course, you do! I figured out how to make them from a Chinese website....and just in case you were wondering, no, I don't read or speak Chinese. Graphics people. I need to see pictures to understand the words that are coming out of your mouth sometimes. The Chinese rosette website had good graphics. I guess that puts me in the visual learner category, and so that's exactly what I'm going to do for you today - Teach by pictures... or at least attempt to.
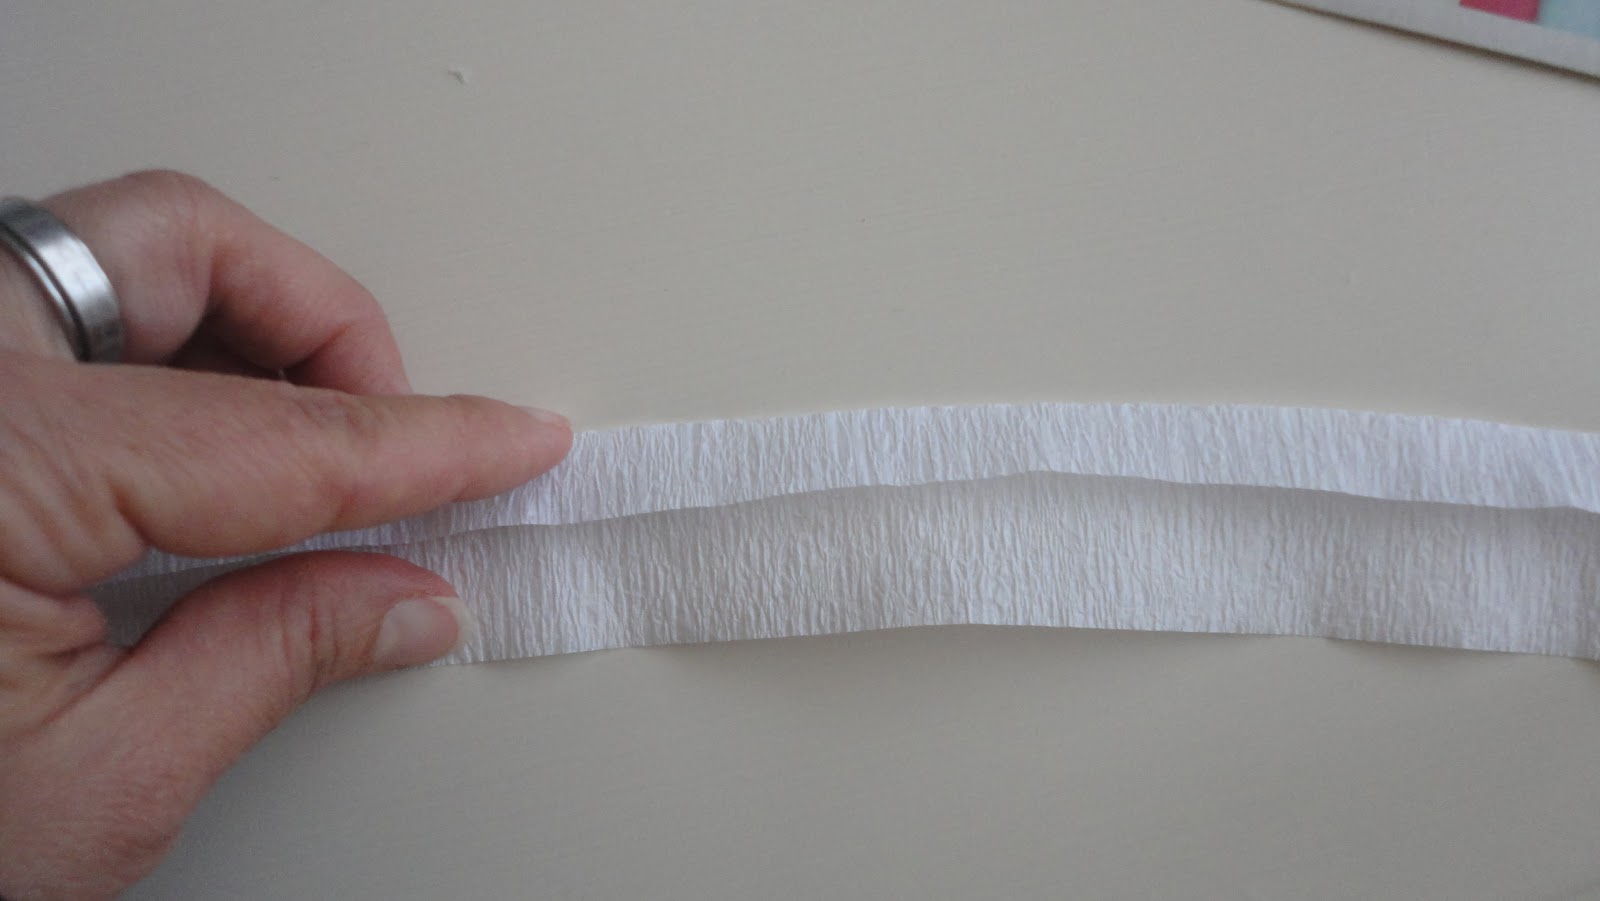
Step 1. Purchase 2 rolls of crepe paper/party streamers and cut them into 24inch lengths and some 12 inch lengths. I used a ruler to measure and you will need more 24inch length sections.

Step 2. Take a piece and fold the top (about 1/3 of the width). Don't worry about being precise here.
Step 3. Start folding the paper between your fingers to create a rosebud. The folded side faces you and is the top of the rose. Pinch the bottom as you fold.

Top of the rose bud

About half way through folding the length of the paper, decide which kind of rosette you want.
Here are your choices.

Step 4. For the plain roll-up, just roll the bud all the way to the end of the length of the paper. Plain roll-up rosettes look good only with themselves and don't mix well with the twist rosettes.
For the first rose pictured, twist and fold the paper inward toward the rosebud

Just keep twisting and rolling inward toward the bud.

Step 5. To make the second rosette, twist and roll the paper outward.

The outward twist rosette is my favorite, but it can fall apart easily if you're not careful.
Step 6. At the end of rolling, hot glue the end piece to the body of the rose.

Step 7. Hot glue the rosettes onto a Styrofoam ball.

Just keep gluing

Just keep gluing

Yes, I love it!
Have a great weekend!
Blessings,
Lisa
I link all my projects with some wonderful blogs. To visit them, go to
the {Link Party Love} page found at the top of this page on the {Home}
bar.
Also linking to:
That is really awesome. I think I might have some of that crepe paper somewhere. I am definitely pinning this. I am your latest follower. Found you via Centsational Girl. Would love for you to stop by my blog and consider following me back.
ReplyDeleteI'm a sucker for any kind of rosettes -LOVE-Following you from Kate's spring party-stop on by for a visit!
ReplyDeleteLove this! Thanks for sharing
ReplyDeleteI love topiaries and I pinned it so maybe I can make one this summer when I am off work! Thanks for the tutorial.
ReplyDeleteI LOVE this!! Came over from the HOH party. This is great!!
ReplyDeleteLooks beautiful! Liz
ReplyDeleteWow, that's really lovely! Thanks for the tutorial.
ReplyDeleteThis is so cute and so cheap to make!! -Jessica
ReplyDeleteLove it!! Thank you for explaining the twisting. I will be trying this out soon.
ReplyDeleteMelissa
redflycreations.blogspot.com
Also a new follower via google friend connect.
That turned out so pretty.
ReplyDeleteJust pretty as can be! Thanks for linking up!
ReplyDeleteStacey of Embracing Change
absolutely gorgeous. and great tutorial - i think i can actually follow it! haha. :)
ReplyDeleteThis is so cute! And you could make it in any color! Thanks for coming to our "Strut Your Stuff Saturday." We hope you'll be back soon! -The Sisters
ReplyDeleteI love any kind of flower, but never expected toilet paper flowers to be so pretty if you known what I mean. Absolutely gorgeous and a very good tutorial! Thanks for sharing your creative inspiration over at Sunday's Best!
ReplyDeleteHello again!
ReplyDeleteVisiting via Wow Us Wednesdays!
Love the rose topiary! I am a sucker for these paper roses!
Thanks for the tutorial and for sharing your lovely project.
Will visit again soon.
Elizabeth
The Porcelain Rose
Thank you for joining me at Home Sweet Home!
ReplyDeleteSherry
SO pretty! I love it and the color combinations could be endless, thanks for sharing! Featuring today at my party at 2:00 PST. Thanks!
ReplyDeleteThis is so beautiful!! I would love if you could link this up to my weekly I Love Fridays party. I think my readers would really appreciate this idea! Have a great weekend!
ReplyDeleteI'm so glad you linked up to my party!! I love this topiary! So pretty!! Have a great week and hope to see you again next Friday :)
ReplyDeleteThis is so pretty! And you are right, rosettes aren't as easy as they look. I think I could make this one, though :)
ReplyDeleteThese are so very pretty, and really inexpensive to make. I am going to try this.
ReplyDelete